Samsung SmartThings Tracker - Manage Zones
Here's how to manage zones via the SmartThings app for your Samsung SmartThings Tracker.
Add Zone
Get notified whenever the tracker moves in or out of the zones that have been set up.
- Open the SmartThings app
.
- From the SmartThings Home screen, select your tracker.
- Tap theMenu icon
(upper-right) then tap
Settings. - TapManage zones.
- TapAdd(upper-right).
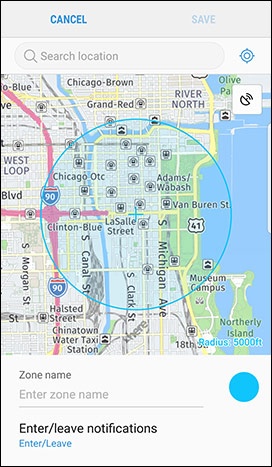
- Enter location in the top field.Search results populate for accuracy.
- Drag the circle to adjust size of the boundary around the set location.You can zoom in or out of the map to adjust the radius of your zone.You can change the center point of your zone by moving around the map.
- In the 'Zone name' field, type a name or description of location (e.g. School, Home, etc.).
- Tap thecolored circlenext to the Zone name field to set a zone color.
- From the 'Enter/leave notifications' section, select when you'd like to get notified:
- Enter/Leave
- Enter
- Leave
- None
- TapSave(upper-right) to set Zone.
Delete Zone
- Open the SmartThings app
- From the SmartThings Home screen, select your tracker.
- Tap theMenu iconSettings.
- TapManage zones.
- From the Zone wanting to remove, tapDelete.
- TapDeleteagain to confirm.