Samsung Galaxy Tab E (8.0) - Activate / Set Up Device
Here's how to perform a quick setup and activation on your Galaxy Tab E (8.0).
If you need to transfer contacts and media from one device to another, follow these step-by-step instructions before activating the new device.
To avoid potential issues, review the following:
- Accounts (e.g., Gmail, email, etc.) should be set up after activating the device (see the Additional Support section at the bottom of this page).
- To activate the device on prepaid service, refer to Set up Verizon Prepaid Data Service.
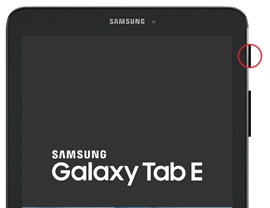
- If powered off, press and hold thePower buttonuntil the Samsung Galaxy Tab E screen appears then release.
- From the Welcome screen, select the appropriate language then tapNEXT.Allow several seconds for activation to complete.
- If presented with the Verify your account screen, sign in with the Google account that was previously synced on the device, tapNEXTthen tapNo.
- If presented with the Tablet activation screen, tap NEXT or tap ACTIVATE NOW (if available).f prompted, enter the Account PIN.If activating a new device, ensure the old device is powered off and allow several minutes for the deactivation of the old device to complete.
- From the Set up Wi-Fi screen, select and connect to the desired network or tap SKIP (lower-right).
- From the Google Sign in screen, tap .
- From the Name screen, enter a name then tapNEXT.
- From the Lock type screen, selectNot now.
- From the Google services screen, select any of the following to turn on or off then tapNEXT(scroll to the bottom).Enabled when a checkmark is present.
- Use Google's location service to help apps
- Improve location accuracy
- Help improve your Android experience
- From the Email setup screen, tapSKIP.
- TapDONE.
- From the Samsung account screen, tapSKIP.
